Android Application Components
Android Application Components are the essential building blocks of an Android application. They are defined in the AndroidManifest.xml file and work together to build a functional app. Each component has its own lifecycle and specific role.
There are four types of app components:
- Activities
- Services
- Broadcast receivers
- Content providers
Activities (UI)
Activities are responsible for User Interface (UI) of an application. It represents a single screen that users interact with.
Types of Activity
-
Main Activity
The Main Activity is the first screen that appears when the application launches. It’s usually specified in the
AndroidManifest.xmlfile. -
Sub Activity
Sub Activities are all screens in the application except the first screen.
Life Cycle of Activity
| Method | When it’s called | Purpose |
|---|---|---|
onCreate(Bundle) |
When the activity is first created | Initialize UI, bind data, restore state if needed. |
onStart() |
Activity is becoming visible to the user | Prepare resources, UI visible but not yet interactive. |
onResume() |
Activity is now in the foreground and interactive | Start animations, sensors, camera preview, etc. |
onPause() |
Another activity is partially covering yours | Save UI state, pause animations, release camera/mic. |
onStop() |
Activity is completely hidden | Release heavier resources, stop services if not needed. |
onRestart() |
Activity is coming back to foreground after onStop() |
Re-initialize any released resources. |
onDestroy() |
Activity is finishing or being destroyed by system | Cleanup final resources. |
Implementation of Activity
MainActivity.java
package com.example.application_2;

import android.os.Bundle;
import android.view.View;
import android.widget.Button;
import android.widget.Toast;

import androidx.activity.EdgeToEdge;
import androidx.appcompat.app.AppCompatActivity;

public class MainActivity extends AppCompatActivity {

    @Override
    protected void onCreate(Bundle savedInstanceState) {
        super.onCreate(savedInstanceState);
        EdgeToEdge.enable(this);
        setContentView(R.layout.activity_main);

        Button btn = findViewById(R.id.button);
        btn.setOnClickListener(new View.OnClickListener() {
            @Override
            public void onClick(View v) {
                Toast.makeText(MainActivity.this, "My First App", Toast.LENGTH_SHORT).show();
            }
        });
    }
}

Toast provides simple feedback about an operation in a small popup. It only fills the amount of space required for the message and the current activity remains visible and interactive. Toasts automatically disappear after a timeout.
Services
Services run in the background to perform long-running operations without user interface. They can continue running even when an activity is running or stopped. For example, background music playback in a game, which continues running even if the main activity is no longer visible.
Types of Services
-
Foreground Components
A foreground service performs some operation that is noticeable to the user. For example, an audio app would use a foreground service to play an audio track. It must display a notification. It continue running even when the user isn’t interacting with the app. When you use a foreground service, you must display a notification so that users are actively aware that the service is running. This notification cannot be dismissed unless the service is either stopped or removed from the foreground. For example: playing music or downloading a file.
-
Background Components
A background service performs an operation that isn’t directly noticed by the user. For example, if an app used a service to compact its storage, or periodic cleanup tasks that would usually be a background service.
-
Unbounded Service
Unbounded Service is a service that runs independently until it finished, regardless of whether the activity that started it is destroyed.
-
Bounded Service
A bound service is the server in a client-server interface. It lets components such as activities bind to the service, send requests, receive responses, and perform IPC. A service is bound when an application component binds to it using
bindService(). An example of bound services is a service providing an API for other components (such as providing data to an activity).A Bound Service is a service that allows components (like Activities, Fragments, or even other apps) to bind to it and communicate with it directly, but the difference here is if you exit the app, you will notice that the service will stop.
What does “bind to the service” mean?
It means the Activity (or another component) tells the system:
“I want to use this service. Give me a connection (Binder) so I can call its functions and interact with it.”
Example: If you playing a music in background, It means your Activity (the UI, like the “Music Player Screen”) is saying to Android:
“Hey system, I want to connect to the
MusicServiceso I can control it directly — like play, pause, skip, or get the current song info.”Once the Activity binds, the system gives it a Binder object, which is basically a bridge that lets the Activity call the service’s methods as if they were local functions.
When creating a service that provides binding, you must provide an IBinder that provides the programming interface that clients can use to interact with the service. You can check it here.
Life Cycle of Services
| Method | When it’s called | Notes |
|---|---|---|
onCreate() |
When the service is first created | Called only once in the service’s lifetime, before onStartCommand() or onBind(). |
onStartCommand(Intent, int, int) |
When another component (like an Activity) calls startService() |
If called multiple times, runs again without recreating the service (unless killed). |
onBind(Intent) |
When another component binds using bindService() |
Returns an IBinder interface for communication. Not called for started services. |
onUnbind(Intent) |
When all clients have unbound from the service | Only for bound services. |
onRebind(Intent) |
When a client re-binds after onUnbind() |
Only if you override it. |
onDestroy() |
When the service is no longer needed and is being destroyed | Cleanup happens here. |
Implementation of Service
Unbounded Service Code Example
Service.java
package com.example.myapp;
import android.app.Service;
import android.content.Intent;
import android.os.Handler;
import android.os.IBinder;
import android.util.Log;

public class MyUnboundService extends Service {

    private static final String TAG = "MyUnboundService";
    private Handler handler;
    private Runnable runnable;

    @Override
    public void onCreate() {
        super.onCreate();
        Log.d(TAG, "Service created");

        handler = new Handler();

        // This will simulate a background task
        runnable = new Runnable() {
            @Override
            public void run() {
                Log.d(TAG, "Service is running...");
                // Repeat every 5 seconds
                handler.postDelayed(this, 5000);
            }
        };
    }

    @Override
    public int onStartCommand(Intent intent, int flags, int startId) {
        Log.d(TAG, "Service started");
        handler.post(runnable);

        // Keep running unless explicitly stopped
        return START_STICKY;
    }

    @Override
    public void onDestroy() {
        Log.d(TAG, "Service destroyed");
        handler.removeCallbacks(runnable);
        super.onDestroy();
    }

    @Override
    public IBinder onBind(Intent intent) {
        // Returning null makes it unbound
        return null;
    }
}
onStartCommand and onDestroy is important as it tells us what happens when the service starts and ends respectively.
AndroidManifest.xml
<service android:name=".Service" />
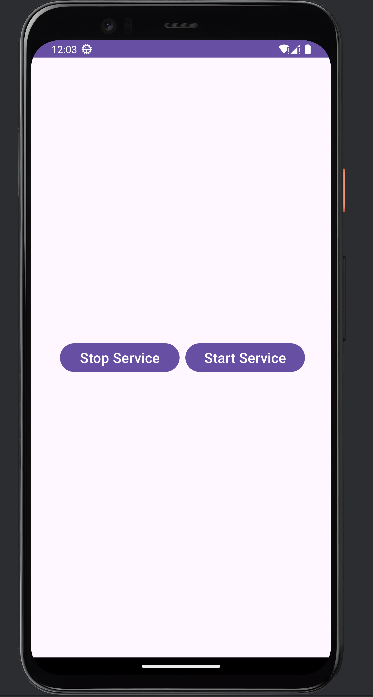
MainActivity.kt
package com.example.application_2

import android.content.Intent
import android.content.IntentFilter
import android.net.wifi.WifiManager
import android.os.Bundle
import android.view.Menu
import android.view.MenuItem
import android.view.View
import android.widget.Button
import android.widget.Toast
import androidx.activity.enableEdgeToEdge
import androidx.appcompat.app.AppCompatActivity
import androidx.appcompat.widget.Toolbar
import androidx.core.view.ViewCompat
import androidx.core.view.WindowInsetsCompat

class MainActivity : AppCompatActivity() {

    private lateinit var wifiStateReceiver: WifiStateReceiver

    override fun onCreate(savedInstanceState: Bundle?) {
        super.onCreate(savedInstanceState)
        setContentView(R.layout.activity_main)

        val btn1 = findViewById<Button>(R.id.button1)

        val serviceIntent = Intent(this, Service::class.java)
        btn1.setOnClickListener {
            startService(serviceIntent)
        }

        val btn2 = findViewById<Button>(R.id.button2)
        btn2.setOnClickListener {
            stopService(serviceIntent)
        }
    }
}

Bounded Service Code Example
MusicService.java
package com.example.myapp;

import android.app.Service;
import android.content.Intent;
import android.media.MediaPlayer;
import android.os.Binder;
import android.os.IBinder;
import android.util.Log;

public class MusicService extends Service {

    private static final String TAG = "MusicService";
    private final IBinder binder = new LocalBinder();
    private MediaPlayer player;

    // Inner class used for binding
    public class LocalBinder extends Binder {
        public MusicService getService() {
            return MusicService.this; // Return this instance so activity can call methods
        }
    }

    @Override
    public IBinder onBind(Intent intent) {
        Log.d(TAG, "Service bound");
        return binder;
    }

    @Override
    public boolean onUnbind(Intent intent) {
        Log.d(TAG, "Service unbound");
        return super.onUnbind(intent);
    }

    public void playMusic() {
        if (player == null) {
            player = MediaPlayer.create(this, R.raw.song); // sample song in res/raw
            player.setLooping(true);
        }
        player.start();
        Log.d(TAG, "Music started");
    }

    public void pauseMusic() {
        if (player != null && player.isPlaying()) {
            player.pause();
            Log.d(TAG, "Music paused");
        }
    }

    public void stopMusic() {
        if (player != null) {
            player.stop();
            player.release();
            player = null;
            Log.d(TAG, "Music stopped");
        }
    }
}
onBind is important as it tells us what happens when I bind the activity with the service.
MusicPlayerActivity.java
package com.example.myapp;

import androidx.appcompat.app.AppCompatActivity;
import android.content.ComponentName;
import android.content.Context;
import android.content.Intent;
import android.content.ServiceConnection;
import android.os.Bundle;
import android.os.IBinder;
import android.view.View;
import android.widget.Button;

public class MusicPlayerActivity extends AppCompatActivity {

    private MusicService musicService;
    private boolean isBound = false;

    private ServiceConnection connection = new ServiceConnection() {
        @Override
        public void onServiceConnected(ComponentName name, IBinder service) {
            MusicService.LocalBinder binder = (MusicService.LocalBinder) service;
            musicService = binder.getService();
            isBound = true;
        }

        @Override
        public void onServiceDisconnected(ComponentName name) {
            isBound = false;
        }
    };

    @Override
    protected void onCreate(Bundle savedInstanceState) {
        super.onCreate(savedInstanceState);
        setContentView(R.layout.activity_music_player);

        Button playBtn = findViewById(R.id.playBtn);
        Button pauseBtn = findViewById(R.id.pauseBtn);
        Button stopBtn = findViewById(R.id.stopBtn);

        Intent intent = new Intent(this, MusicService.class);
        bindService(intent, connection, Context.BIND_AUTO_CREATE);

        playBtn.setOnClickListener(v -> {
            if (isBound) musicService.playMusic();
        });

        pauseBtn.setOnClickListener(v -> {
            if (isBound) musicService.pauseMusic();
        });

        stopBtn.setOnClickListener(v -> {
            if (isBound) musicService.stopMusic();
        });
    }

    @Override
    protected void onDestroy() {
        super.onDestroy();
        if (isBound) {
            unbindService(connection);
            isBound = false;
        }
    }
}
bindService starts to bind activity with service.
Broadcast Receivers
Broadcast is an action sent by the system or app to notify other components about an event.
A Broadcast Receiver is a component that listens for a specific broadcast to perform actions when they occur.
Example of Broadcast Receiver: A receiver that listens for ACTION_POWER_CONNECTED to notify the user when the device is plugged in.
Types of Broadcast
- System Broadcast: Sent by the Android system (e.g.,
BOOT_COMPLETED,BATTERY_LOW,SMS_RECEIVED). - Custom Broadcast: Sent by applications using
sendBroadcast()orLocalBroadcastManagerto communicate events or notify other components.
Types of Broadcast Receiver
-
Static Broadcast Receiver
A Static Broadcast Receiver is declared in
AndroidManifest.xmland is always active as long as the app is installed. -
Dynamic Broadcast Receiver
A Dynamic Broadcast Receiver is registered programmatically at runtime using
registerReceiver(). It is active only while the app or activity is running.
Why to use Broadcast Receivers
You can use Broadcast Receivers to:
- Listen for system events such as battery status, network changes, or charging status.
- Notify other components about specific events in the app.
- Trigger custom events between activities, services, or other apps.
Implementation of static broadcast receiver
WifiStateReceiver.java
package com.example.application_2;
import android.content.BroadcastReceiver;
import android.content.Context;
import android.content.Intent;
import android.net.wifi.WifiManager;
import android.widget.Toast;
public class WifiStateReceiver extends BroadcastReceiver {
@Override
public void onReceive(Context context, Intent intent) {
if (WifiManager.WIFI_STATE_CHANGED_ACTION.equals(intent.getAction())) {
int wifiState = intent.getIntExtra(WifiManager.EXTRA_WIFI_STATE, WifiManager.WIFI_STATE_UNKNOWN);
switch (wifiState) {
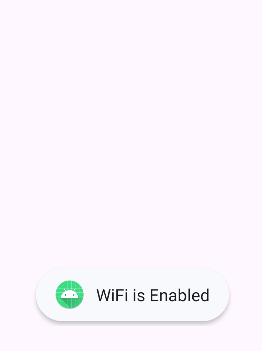
case WifiManager.WIFI_STATE_ENABLED:
Toast.makeText(context, "WiFi is Enabled", Toast.LENGTH_LONG).show();
break;
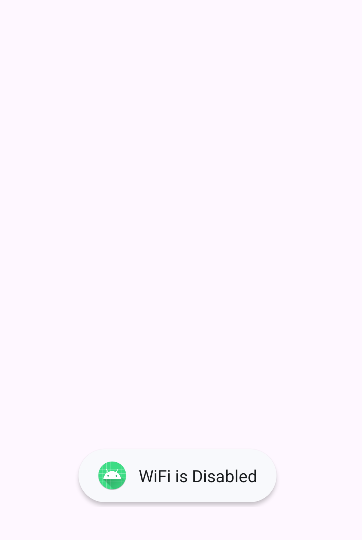
case WifiManager.WIFI_STATE_DISABLED:
Toast.makeText(context, "WiFi is Disabled", Toast.LENGTH_LONG).show();
break;
}
}
}
}
MainActivity.java
package com.example.application_2;

import android.content.IntentFilter;
import android.net.wifi.WifiManager;
import android.os.Bundle;

import androidx.appcompat.app.AppCompatActivity;

public class MainActivity extends AppCompatActivity {

    private WifiStateReceiver wifiStateReceiver;

    @Override
    protected void onCreate(Bundle savedInstanceState) {
        super.onCreate(savedInstanceState);
        setContentView(R.layout.activity_main);

        wifiStateReceiver = new WifiStateReceiver();
        IntentFilter filter = new IntentFilter(WifiManager.WIFI_STATE_CHANGED_ACTION);
        registerReceiver(wifiStateReceiver, filter);
    }

    @Override
    protected void onDestroy() {
        super.onDestroy();
        unregisterReceiver(wifiStateReceiver);
    }
}
AndroidManifest.xml
<receiver android:name=".WifiStateReceiver"
    android:exported="true">
    <intent-filter>
        <action android:name="android.net.wifi.WIFI_STATE_CHANGED" />
    </intent-filter>
</receiver>
Content Provider & Resolver
Content Provider is a component in Android that manages access to a structured set of data stored in a database, shared preferences, files, or any data source. It acts as an abstraction layer between the data source and the components that need to access the data (e.g., activities, services, or other apps). Content providers are primarily used to share data between applications securely.
For example, the Contacts app acts as a Content Provider, allowing other apps (like WhatsApp, Messages, or the Dialer) to access contact details.
Key Concepts
-
Data Sharing:
- Content providers allow apps to share data with other apps while maintaining control over access permissions.
-
Structured Data:
- Data is typically organized in a tabular format, similar to a database, with rows and columns.
-
URI (Uniform Resource Identifier):
-
Each content provider is identified by a unique URI, which is used to query or modify the data.
-
Example:
content://com.example.provider/table_namecontent://<authority>/<path>/<id>content://=> Scheme used by content providers.authority=> The unique name of the content provider (usually the package name).path=> The data type (e.g., “contacts”, “images”).id=> The specific data item (optional).
-
-
CRUD Operations:
- Content providers support the four basic database operations:
- Create: Insert new data.
- Read: Query existing data.
- Update: Modify existing data.
- Delete: Remove data.
- Content providers support the four basic database operations:
Life Cycle of Content Provider
query(): A method that accepts arguments and fetches the data from the desired table. Data is retired as a cursor object.insert(): To insert a new row in the database of the content provider. It returns the content URI of the inserted row.update(): This method is used to update the fields of an existing row. It returns the number of rows updated.delete(): This method is used to delete the existing rows. It returns the number of rows deleted.getType(): This method returns the Multipurpose Internet Mail Extension(MIME) type of data to the given Content URI.onCreate(): As the content provider is created, the android system calls this method immediately to initialise the provider.
Implementation of Content Provider
DatabaseHelper.kt
package com.example.myapp;

import android.content.Context;
import android.database.sqlite.SQLiteDatabase;
import android.database.sqlite.SQLiteOpenHelper;

public class DatabaseHelper extends SQLiteOpenHelper {

    public static final String DATABASE_NAME = "UsersDB";
    public static final int DATABASE_VERSION = 1;
    public static final String TABLE_NAME = "users";
    public static final String COLUMN_ID = "_id";
    public static final String COLUMN_NAME = "name";
    public static final String COLUMN_AGE = "age";

    private static final String CREATE_TABLE =
            "CREATE TABLE " + TABLE_NAME + " (" +
                    COLUMN_ID + " INTEGER PRIMARY KEY AUTOINCREMENT, " +
                    COLUMN_NAME + " TEXT, " +
                    COLUMN_AGE + " INTEGER);";

    public DatabaseHelper(Context context) {
        super(context, DATABASE_NAME, null, DATABASE_VERSION);
    }

    @Override
    public void onCreate(SQLiteDatabase db) {
        db.execSQL(CREATE_TABLE);
    }

    @Override
    public void onUpgrade(SQLiteDatabase db, int oldVersion, int newVersion) {
        db.execSQL("DROP TABLE IF EXISTS " + TABLE_NAME);
        onCreate(db);
    }
}
The Database Helper:
- Creates the database (if it doesn’t exist yet)
- Creates tables inside it
- Handles version upgrades
- Gives you access to read/write data safely
- SQLite is usually used in while storing data in database.
MyContentProvider.java
package com.example.myapp;

import android.content.ContentProvider;
import android.content.ContentUris;
import android.content.ContentValues;
import android.content.UriMatcher;
import android.database.Cursor;
import android.database.sqlite.SQLiteDatabase;
import android.net.Uri;

public class MyContentProvider extends ContentProvider {

    private static final String AUTHORITY = "com.example.myapp.provider";
    private static final String PATH_USERS = "users";
    public static final Uri CONTENT_URI = Uri.parse("content://" + AUTHORITY + "/" + PATH_USERS);

    private static final int USERS = 1;
    private static final int USER_ID = 2;
    private static final UriMatcher uriMatcher = new UriMatcher(UriMatcher.NO_MATCH);

    static {
        uriMatcher.addURI(AUTHORITY, PATH_USERS, USERS);
        uriMatcher.addURI(AUTHORITY, PATH_USERS + "/#", USER_ID);
    }

    private DatabaseHelper dbHelper;

    @Override
    public boolean onCreate() {
        dbHelper = new DatabaseHelper(getContext());
        return true;
    }

    @Override
    public Cursor query(Uri uri, String[] projection, String selection,
                        String[] selectionArgs, String sortOrder) {
        SQLiteDatabase db = dbHelper.getReadableDatabase();
        Cursor cursor;

        switch (uriMatcher.match(uri)) {
            case USERS:
                cursor = db.query(DatabaseHelper.TABLE_NAME, projection, selection, selectionArgs,
                        null, null, sortOrder);
                break;
            case USER_ID:
                selection = DatabaseHelper.COLUMN_ID + "=?";
                selectionArgs = new String[]{String.valueOf(ContentUris.parseId(uri))};
                cursor = db.query(DatabaseHelper.TABLE_NAME, projection, selection, selectionArgs,
                        null, null, sortOrder);
                break;
            default:
                throw new IllegalArgumentException("Unknown URI: " + uri);
        }

        cursor.setNotificationUri(getContext().getContentResolver(), uri);
        return cursor;
    }

    @Override
    public Uri insert(Uri uri, ContentValues values) {
        SQLiteDatabase db = dbHelper.getWritableDatabase();
        long id = db.insert(DatabaseHelper.TABLE_NAME, null, values);
        if (id > 0) {
            Uri newUri = ContentUris.withAppendedId(CONTENT_URI, id);
            getContext().getContentResolver().notifyChange(newUri, null);
            return newUri;
        }
        return null;
    }

    @Override
    public int delete(Uri uri, String selection, String[] selectionArgs) {
        SQLiteDatabase db = dbHelper.getWritableDatabase();
        int rowsDeleted = db.delete(DatabaseHelper.TABLE_NAME, selection, selectionArgs);
        getContext().getContentResolver().notifyChange(uri, null);
        return rowsDeleted;
    }

    @Override
    public int update(Uri uri, ContentValues values, String selection, String[] selectionArgs) {
        SQLiteDatabase db = dbHelper.getWritableDatabase();
        int rowsUpdated = db.update(DatabaseHelper.TABLE_NAME, values, selection, selectionArgs);
        getContext().getContentResolver().notifyChange(uri, null);
        return rowsUpdated;
    }

    @Override
    public String getType(Uri uri) {
        switch (uriMatcher.match(uri)) {
            case USERS:
                return "vnd.android.cursor.dir/vnd.com.example.myapp.users";
            case USER_ID:
                return "vnd.android.cursor.item/vnd.com.example.myapp.users";
            default:
                throw new IllegalArgumentException("Unknown URI: " + uri);
        }
    }
}
In CRUD operations:
query()represents the read operation used to retrieve data.insert()adds data.update()modifies data.delete()removes data.
query(Uri uri, String[] projection, String selection, String[] selectionArgs, String sortOrder) parameters:
Assume the following SQL query:
SELECT id, name, phone FROM contacts WHERE city = 'Cairo' ORDER BY name ASC;
This SQL query fetches id, name, and phone from the contacts table where the city is Cairo.
The equivalent in a content provider query is:
projection: Specifies the columns you want to retrieve.selection: Acts as the filter condition for specific rows. The?is a placeholder.selectionArgs: Replaces the?in the selection — here it becomesWHERE city = 'Cairo'.sortOrder: Defines how to sort results — alphabetically by name in ascending order.
So, the SQL query looks like the following:
SELECT projection, phone FROM contacts WHERE selection ORDER BY sortOrder;
AndroidManifest.xml
<provider
    android:name=".UserContentProvider"
    android:authorities="com.example.userprovider"
    android:exported="true"
    android:grantUriPermissions="true" />
MainActivity.java
package com.example.myapp;

import android.content.ContentValues;
import android.database.Cursor;
import android.net.Uri;
import android.os.Bundle;
import android.widget.TextView;
import androidx.appcompat.app.AppCompatActivity;

public class MainActivity extends AppCompatActivity {

    @Override
    protected void onCreate(Bundle savedInstanceState) {
        super.onCreate(savedInstanceState);
        setContentView(R.layout.activity_main);

        Uri uri = MyContentProvider.CONTENT_URI;

        // Insert a new user
        ContentValues values = new ContentValues();
        values.put("name", "Abdelrahman");
        values.put("age", 23);
        getContentResolver().insert(uri, values);

        // Query users
        Cursor cursor = getContentResolver().query(uri, null, null, null, null);

        StringBuilder builder = new StringBuilder();
        if (cursor != null) {
            while (cursor.moveToNext()) {
                String name = cursor.getString(cursor.getColumnIndexOrThrow("name"));
                int age = cursor.getInt(cursor.getColumnIndexOrThrow("age"));
                builder.append("Name: ").append(name).append(", Age: ").append(age).append("\n");
            }
            cursor.close();
        }

        TextView textView = findViewById(R.id.textView);
        textView.setText(builder.toString());
    }
}
How To Access Content Provider
You can call a Content Provider through adb using the following command:
adb shell content query --uri content://<authority>/<table_name>
query: The operation to call.content://: The scheme used by content providers (likehttp://on the web).authority: The unique name of the content provider (usually the package name). You can think of it as a URL.table_name: The table you want to read.
Example: content://com.example.myapp.provider/users
What is Content Resolver
Content Resolver is like a messenger for apps that want to communicate with the content providers of other apps. You can think of it as a way to interact with a content provider to access data.
Example:
- App A calls a method on
ContentResolver(likeinsert(),query(), etc.). - The
ContentResolveruses a URI to find the correct Content Provider. - The
ContentProviderperforms the requested database operation. - The result (like a
Cursorfor query results) is sent back to theContentResolver, then to your app.
Implementation of Content Resolver
We already have a ContentProvider (like MyContentProvider) that exposes user data at:
content://com.example.myapp.provider/users
Now, we’ll use the Content Resolver to interact with that provider from our Activity.
import android.content.ContentResolver;
import android.database.Cursor;
import android.net.Uri;
import android.provider.ContactsContract;
import android.util.Log;
import android.content.Context;

public class ContactFetcher {

    public static void fetchContacts(Context context) {
        // Content URI for the contacts provider
        Uri CONTENT_URI = ContactsContract.CommonDataKinds.Phone.CONTENT_URI;

        // Columns we want to retrieve
        String[] projection = {
                ContactsContract.CommonDataKinds.Phone._ID,
                ContactsContract.CommonDataKinds.Phone.DISPLAY_NAME,
                ContactsContract.CommonDataKinds.Phone.NUMBER
        };

        // Get the ContentResolver
        ContentResolver resolver = context.getContentResolver();

        // Query the contacts database
        Cursor cursor = resolver.query(CONTENT_URI, projection, null, null,
                ContactsContract.CommonDataKinds.Phone.DISPLAY_NAME + " ASC");

        // Read the data
        if (cursor != null) {
            while (cursor.moveToNext()) {
                int id = cursor.getInt(cursor.getColumnIndexOrThrow(ContactsContract.CommonDataKinds.Phone._ID));
                String name = cursor.getString(cursor.getColumnIndexOrThrow(ContactsContract.CommonDataKinds.Phone.DISPLAY_NAME));
                String phone = cursor.getString(cursor.getColumnIndexOrThrow(ContactsContract.CommonDataKinds.Phone.NUMBER));

                Log.d("ContactFetcher", "ID: " + id + ", Name: " + name + ", Phone: " + phone);
            }
            cursor.close();
        }
    }
}
The app takes the URL and store it to handler later, then it takes the projection (columns to retrieve), then it start to communicate with query() from content provider to retrieve desired data.
In addition to the four main components, Android provides several mechanisms that allow these components — and even different apps — to communicate and interact with each other:
- Intent: A messaging object used to request an action from another app component.
- Intent Filter: A declaration in the manifest that specifies which intents a component can respond to.
- WebView: A view that allows apps to display and interact with web content within the application.
- Deep Link: A special type of intent that lets users open a specific screen in your app directly from a URL or link.
Intents
Intents and Intent Filters are not Android components, but they are crucial concepts to understand in Android. They enable communication between different components (e.g., activities, services, broadcast receivers) and even between different applications.
An Intent is a messaging object used to request an action from another component or application. It acts as a bridge that helps pass data or instructions between components (e.g., Activity, Service, BroadcastReceiver).
Types of Intents
-
Implicit Intents
These don’t specify the component. Instead, the system determines which component can handle the request based on the intent filters declared in the manifest.
Code Example:
Intent intent = new Intent(Intent.ACTION_VIEW); intent.setData(Uri.parse("https://www.google.com")); startActivity(intent); -
Explicit Intents
These specify the component by name (Activity or Service) and are used within the same application for direct communication.
Code Example:
val intent = Intent(this, SecondActivity::class.java)
intent.putExtra("message", "Hello from MainActivity")
startActivity(intent)
Why to use Intents
- Starting an Activity or Service.
- Delivering a broadcast message.
- Passing data between components.
- Opening system features (e.g., camera, browser).
Intent Filters
An Intent Filter is a declaration in the AndroidManifest.xml file that specifies the types of intents a component (e.g., activity, service, broadcast receiver) can handle. It allows a component to receive implicit intents. Components register Intent Filters in the manifest to indicate the actions they can handle.
Intent Filter Attributes
-
Action: Describes the operation to be performed (
android.intent.action.VIEW).common action:
ACTION_VIEW: Use this action in intent with startActivity() when you have some information that activity can show to the user like showing an image in a gallery app or an address to view in a map appACTION_SEND: You should use this in intent with startActivity() when you have some data that the user can share through another app, such as an email app or social sharing app.
- Data: Specifies the type of data the component can handle (
http://,content://). -
Category: Adds additional information about the component that can handle the intent (
android.intent.category.DEFAULT).common categories:
CATEGORY_BROWSABLE: The target activity allows itself to be started by a web browser to display data referenced by a link.
How Intent Filters Work
-
Declare Intent Filters:
- Add
<intent-filter>tags to the component in the manifest file.
- Add
-
Match Intents:
- The system matches incoming implicit intents with the declared intent filters.
-
Resolve Components:
- If a match is found, the component is activated.
Example of Intent Filters
1. Handling a Web URL
-
Declare an intent filter to handle web URLs in an activity.
<activity android:name=".WebActivity"> <intent-filter> <action android:name="android.intent.action.VIEW" /> <category android:name="android.intent.category.DEFAULT" /> <category android:name="android.intent.category.BROWSABLE" /> <data android:scheme="https" android:host="www.example.com" /> </intent-filter> </activity> -
When another app sends an implicit intent to view
https://www.example.com, this activity will be launched.
2. Sharing Text
-
Declare an intent filter to handle text sharing.
<activity android:name=".ShareActivity"> <intent-filter> <action android:name="android.intent.action.SEND" /> <category android:name="android.intent.category.DEFAULT" /> <data android:mimeType="text/plain" /> </intent-filter> </activity> -
When another app sends an implicit intent to share text, this activity will be listed as an option.
Example of Intents and Intent Filters
Scenario
- A user clicks a button in the app to open a website.
- The system sends an implicit intent to open the URL.
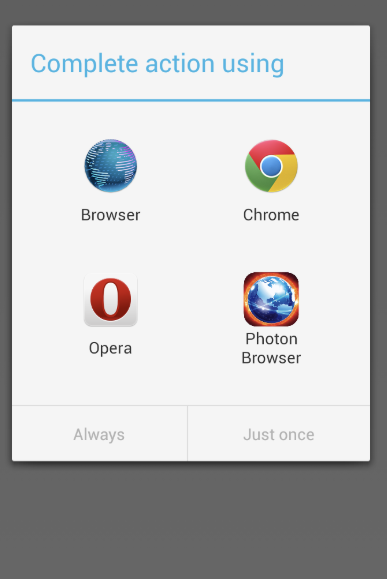
- The user is presented with a list of browsers (e.g., Chrome, Firefox, Edge).
- The user selects Google Chrome to open the website.
- The URL is opened in Chrome.
How It Works
-
Implicit Intent (Triggering the URL Opening Action)
-
When the user clicks the button, the app creates an implicit intent to open a webpage.
- The intent includes:
- Action:
Intent.ACTION_VIEW(to view the URL). - Data: The URL of the website (e.g.,
https://www.google.com).
- Action:
-
Example Code (Sending the Intent from MainActivity.java)
package com.example.intentsdemo;

import android.content.Intent;
import android.net.Uri;
import android.os.Bundle;
import android.view.View;
import android.widget.Button;
import androidx.appcompat.app.AppCompatActivity;

public class MainActivity extends AppCompatActivity {
    @Override
    protected void onCreate(Bundle savedInstanceState) {
        super.onCreate(savedInstanceState);
        setContentView(R.layout.activity_main);

        Button openBrowserButton = findViewById(R.id.openBrowserButton);
        openBrowserButton.setOnClickListener(new View.OnClickListener() {
            @Override
            public void onClick(View v) {
                // Create an implicit intent to open a URL
                Intent intent = new Intent(Intent.ACTION_VIEW);

                // Set the website URL
                intent.setData(Uri.parse("https://www.google.com"));

                // Allow the user to choose a browser
                startActivity(Intent.createChooser(intent, "Open with"));
            }
        });
    }
}
-
-
Intent Filter (Declaring Browser App Compatibility)
-
The browser apps (e.g., Chrome, Firefox) declare an intent filter in their
AndroidManifest.xmlfile. -
This lets the system know that they can handle web URLs.
- The intent filter specifies:
- Action:
Intent.ACTION_VIEW - Category:
Intent.CATEGORY_BROWSABLE(so it appears in the browser selection list). - Data: Scheme
httpandhttps(to handle web links).
- Action:
-
Example (Intent Filter in Browser Apps like Chrome, Firefox, etc.)
<activity android:name=".BrowserActivity">
    <intent-filter>
        <action android:name="android.intent.action.VIEW" />
        <category android:name="android.intent.category.BROWSABLE" />
        <data android:scheme="http" />
        <data android:scheme="https" />
    </intent-filter>
</activity>
-
-
Chooser Dialog (Allowing the User to Select a Browser)
-
When the intent is sent, Android checks for apps that match the intent filter.
-
If multiple apps (e.g., Chrome, Firefox, Edge) can handle the request, a chooser dialog appears.
-
The user selects Google Chrome.
-
-
Opening the URL in Chrome
-
Once the user selects Chrome, it receives the intent with the URL data.
-
Chrome opens the website using its internal web rendering engine.
-
WebView
Android apps can interact with websites using a URL and an intent with ACTION.VIEW then load it into browser. Suppose we want to embed the website into an application, so we can use WebView.
WebView is a subclass of android.view.View, specifically android.webkit.WebView. It uses the WebKit rendering engine to display web pages.
It allows your Android app to:
- Load and display web pages using URLs (
webView.loadUrl("<https://example.com>")) - Load HTML directly using strings (
webView.loadData(...)) - Run JavaScript (if enabled)
- Interact between Java and JavaScript (via
addJavascriptInterface)
Implementation of WebView
activity_main.xml
<WebView
    android:id="@+id/big_webview"
    android:layout_width="match_parent"
    android:layout_height="match_parent">
</WebView>
Then reference the WebView element in our code and we can load a URL into it:
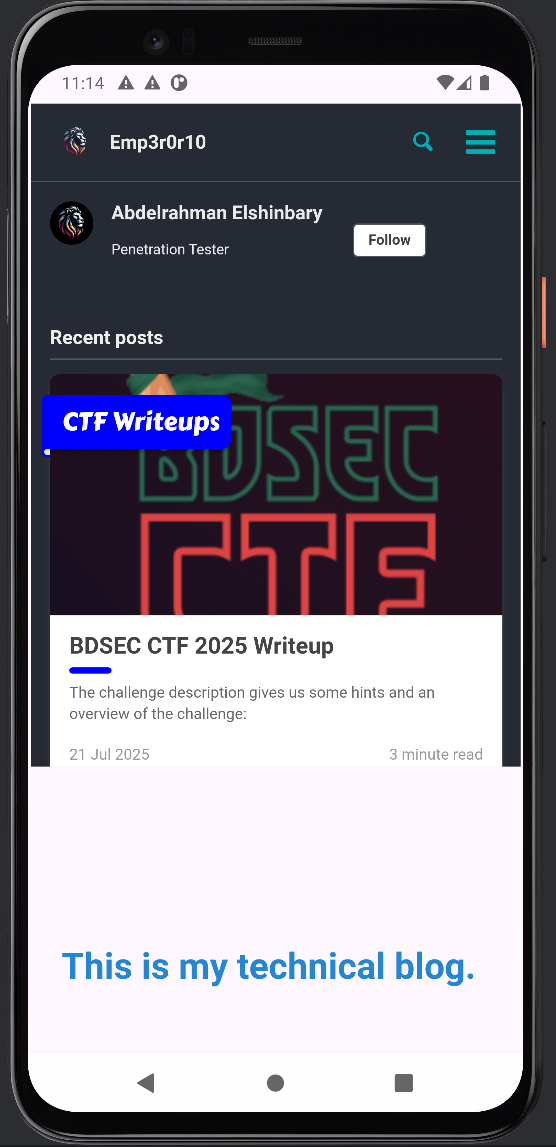
WebView webView = findViewById(R.id.webview);
webView.getSettings().setJavaScriptEnabled(true);  // Enable JavaScript (Insecure)
webView.loadUrl("https://www.google.com");  // Load a webpage
Note: you need to ensure that your app uses internet permissions in
AndroidManifest.xml<uses-permission android:name="android.permission.INTERNET"/>
We can load the app and see that it works as expected:
Common WebView Settings
Enable JavaScript (disabled by default for security)
Allows the web page inside the WebView to run JavaScript.
webSettings.setJavaScriptEnabled(true);
Control Zooming
webSettings.setBuiltInZoomControls(true);
webSettings.setDisplayZoomControls(false);
setBuiltInZoomControls(true): Allows pinch-to-zoom.setDisplayZoomControls(false): Hides the zoom buttons on screen.
Adjust to Screen Size (Responsive)
Makes the web page fit nicely inside the WebView on different screen sizes.
webSettings.setUseWideViewPort(true);
webSettings.setLoadWithOverviewMode(true);
Caching Storage
Allows websites to store data locally (e.g., login sessions).
webSettings.setDomStorageEnabled(true);   // Enable HTML5 local storage
webSettings.setAppCacheEnabled(true);     // Enable caching for offline support
Allow File Access
Lets the WebView access files stored on the device or in the app.
webSettings.setAllowFileAccess(true);
webSettings.setAllowContentAccess(true);
Text Size & Scaling
Controls how large text appears in the WebView.
webSettings.setTextZoom(100); // Default = 100%
Mixed Content (HTTP inside HTTPS page)
Lets the WebView load HTTP content inside HTTPS pages (useful but less secure).
if (Build.VERSION.SDK_INT >= Build.VERSION_CODES.LOLLIPOP) {
    webSettings.setMixedContentMode(WebSettings.MIXED_CONTENT_ALWAYS_ALLOW);
}
Handling Navigation with shouldOverrideUrlLoading
Controls how new links inside the WebView are handled.
By default, WebView opens links inside itself. Overriding this method gives you the option to block, open externally, or restrict domains for security.
myWebView.setWebViewClient(new WebViewClient() {
    @Override
    public boolean shouldOverrideUrlLoading(WebView view, WebResourceRequest request) {
        String url = request.getUrl().toString();

        // Block malicious links
        if (url.contains("phishing.com")) {
            return true; // Prevent loading
        }

        // Open external links in the device browser
        if (url.startsWith("http://") || url.startsWith("https://")) {
            Intent intent = new Intent(Intent.ACTION_VIEW, Uri.parse(url));
            view.getContext().startActivity(intent);
            return true; // We handled it
        }

        return false; // Default: load inside WebView
    }
});
Deep Link
Deep Links is a URL that redirect or navigate user to a specific location in an android app. suppose you are searching for an app in google and clicks on the link related to app, this link navigate you to either to google play store specially the app screen (if app not installed) or the app itself (if installed).
Deep Link URI Structure
A deep link URI typically consists of:
- Scheme: Defines the protocol (
http,https,myapp). - Host: Specifies the domain (
example.com,myapp.com). - Path: Defines the specific path or resource (
/content/12345,/page/12345).
Example Deep Link URI:
myapp://target.xyz/home
In this case:
- Scheme:
myapp - Host:
target.xyz - Path:
/home
Implementation of Deep Link
AndroidManifest.xml
<activity android:name=".ShopActivity">
    <intent-filter>
        <action android:name="android.intent.action.VIEW" />
        <category android:name="android.intent.category.DEFAULT" />
        <category android:name="android.intent.category.BROWSABLE" />
        <data android:scheme="myapp"
			        android:host="target.xyz"
			        android:pathPrefix="/Shop/" />
    </intent-filter>
</activity>
-
Define
ACTION_VIEWto make the intent filter can be reached from Google Search. - Define
BROWSABLEcategory in order to be accessible from a web browser (strong indication that the activity uses deeplink). - Define
DEFAULTcategory for responding to implicit intents. - Define
<data>tag to represents a URI format that resolves to the activity.
MainActivity.java
@Override
protected void onCreate(Bundle savedInstanceState) {
    super.onCreate(savedInstanceState);
    setContentView(R.layout.activity_shop);

    // Get the URI from the Intent
    Uri uri = getIntent().getData();
    if (uri != null) {
        String productId = uri.getLastPathSegment();
        // Use the product ID to load product data
    }
}
What is the difference Between Android App Link & Deep Link?
- Android App Link is a type of deep link which based on web URL (e.g.,
https://example.com/) + verification → opens app if installed, else falls back to browser.- Deep Link opens an app directly (if installed) and navigate to specific location or content.